Print

30 September 2018

Adore, for D-lish Scraps

Hi everyone, my turn again!

It also happens to be my last turn as I step down from this amazing team. 

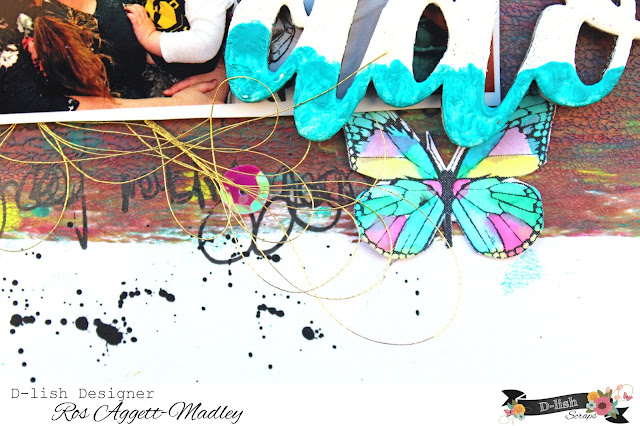
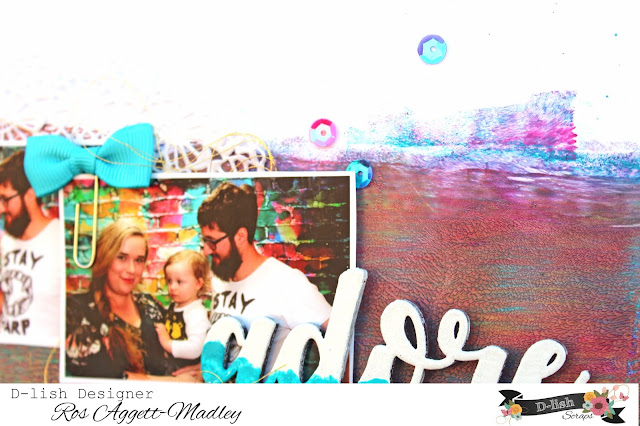
This page was based around my painty background.  Some of the goodies from D-lish Scraps are 'raw', so are perfect for altering to the colours that match your projects.


Firstly I layered my photos on some Paper Doilies, gold thread and a little journaling.
I've then used some water colour brushes to colour a butterfly from a pack of Colour Me Cuts.


The Chipboard title has been heat embossed and the blue on there is a little paint dabbed on with some paper towel.

You'll also find on here a Bitty Bow and a few Sequins.

Thanks for joining me again, I've loved sharing with you 


Hope you've been inspired.
post signature

21 September 2018

For Colour Blast

Hello.


My page today started with an idea to try and experiment with alcohol and Colour Artist Inks. 
I want to start by saying that I didn't make "alcohol ink" as we already know it, but it definitely has a very close look to it when dry.

I also want to say that if you're going to play with Alcohol in your products, be in a ventilated area.  The odour is quite strong.


First I've added a small amount of alcohol (high percentage purchased from hardware store) to some little tubs.
I added a dropper full of each colour into each tub and gave them a little swirl.


Then I popped a small amount of alcohol blending solution on some strips of yupo and added the colours with some pipettes.  Today I used Citrus Colour Artist Ink, Lime Colour Artist Ink and Mermaid Colour Artist Ink.

I kept repeating this and adding spritzes of alcohol until I was happy with the result.  I also used a straw to blow this around the yupo. As the ink dries it changes shape and colour and is a more matte look on the yupo.

Again, make sure you are in a well ventilated area to do this.


I did try experimenting also, only using blending solution and no alcohol but found the ink didn't move as freely.  Also the darker colours way took over the lighter ones and had a lot longer drying time.


Once dried, I die cut these into hearts and glued them across a small strip of the yupo.  When this was dry I messy machine stitched across these.  I left the big one and the little row of heats off so that I could add them at the end with a little dimension.


For my background I used Peacock Colour Shimmer Dust.
This was mixed with a small amount of water on some plastic packaging and I smooched it down onto the paper a few times.
Each time I rub my fingers over the plastic, moving the colour where to where I want it.  
I was also able to manipulate where and how the colour looked with some heat drying.


Once dried (and drooled over cause look at that colour ♥) I've done a little random stamping.

My whole plan with the "alcohol ink" thing was to add foil to my little hearts.  The method I used in this post just didn't work as it normally does.  I found my mix of alcohol and Colour Artist Ink just wasn't as sticky as Alcohol Ink itself, so the foil just wouldn't stick to the ink.  It just wanted to wipe it off.


So to get around that, I have used a 'marble' type look stencil and smooched some sticky glue into it and adhered some gilding flakes.  Once stuck you just buff off the excess.


OMG.  I could not be happier with the way this looks on the Peacock ink.  Definitely added to my to do again list. 


The last thing I did was pick my photo.  Unless I have a specific pic I want to use, I tend to work backwards cause to me it's all about creating and memory making is the last thing I'm thinking of.


Lucky I had the perfect photo to go with.

I then just trimmed the edges and mounted on some black cardstock. 


Hope you've been inspired ♥


post signature

20 September 2018

Friends, for D-lish Scraps

Hi everyone,
Today I'm sharing my page for The Scrap Suite monthly challenges.

This month I've gone with Blue and Green must never be seen.  

On top of my layer of paint, I've added some Colour Blast paste with a Moroccan Fleur  stencil


I've layered my photo on a piece of torn card stock with some paper leaves layered underneath.  I added a little ink to the leaves for some more dimension.


I also added a paper doily under the photo with a sequin bow and chipboard word.


I also added a few D-lish Enamel Dots.


Down the bottom corner I also used another stencil, this time Fleur-de-lis.


post signature

10 September 2018

Some cards for D-lish Scraps

Hi everyone, my share today is something a little different for me.
I have made a set of cards using embellishments from D-lish Scraps.
The base of the cards have been made with alcohol ink and some rose gold foil.

My first card features a Creative Cut - Written in the Stars and some Wood Veneer - Mixed Stars.  These have been painted with gold gesso.

Next up I have used another Creative Cut, this time, Flowers, and also a Chipboard Word.


The next 2 cards feature a Creative Cuts - Feathers, the first painted with gold gesso and the other left white.


I also added a chipboard word to this one.
All of the cards also have a small scatter of Sequins.

post signature

09 September 2018

Free Spirit for Colour Blast

 Hi everyone, thanks for joining me again.
Today I'm sharing a page featuring the gorgeous Colour Artist Inks.
I had heaps of fun with these, creating a water type background.


I used a piece of water colour paper that I cut down to just under a 12 inch square.  I cut it a little smaller so that I could mount it on a piece of black card stock once my water colouring had dried.

I started the page by laying down a fairly generous amount of clean water.  I put this down only in places I wanted to use the Colour Artist Inks
I then used my wet brush to pick up the ink and drop it where the water was letting the colour flow over my page.


I started with a layer of Oasis Colour Artist Ink. 

Then one colour at a time, I added some Calypso Colour Artist Ink, Mermaid Colour Artist Ink, Grass Colour Artist Ink and a little Lime Colour Artist Ink.


 I made some mermaid tails out of a cake mould and some paper clay.


I used Oasis and Mermaid Colour Artist Ink to colour my tail, trying to alternate each colour on each line of scales.


Once finished I went over the top of the whole scale with a clear.Colour Shimmer Brush Marker.
This gave the tail a nice shimmery look.


Before I started my page, I did a little tester to see how the Colour Artist Inks reacted with water and the paper I was using.  Cause I don't like wasting anything, I used this to die cut a few wavy looking pieces to pop under my photo cluster.


For my title piece of chipboard, I have heat embossed this with Envy Colour Embossing Powder.  Again, 3 times for a nice thick layer.


Hope you've been inspired.


post signature